

Node Package Manager (NPM)

I am a software professional specialising in web development and generative AI. I enjoy sharing knowledge and learning from the community. I offer consulting services and speak at events, seminars, and workshops.
Need for NPM
Node.js has got built-in modules for accessing the file system, networking, and other I/O operations. The problem is it offers only essential packages as core modules. We often want to use some external packages to re-use code and avoid complexity. Node has a way to cater to these packages through the node package manager (npm). NPM offers a fleet of packages that are highly used in production-grade apps. Express is one such example that has seen a wider adoption. We will learn more about express.js in an upcoming post, stay tuned to this Node.js series. Also, there are many notable packages like react, react-dom, underscore, vue, axios, body-parser, etc.
Initiate NPM
To start with npm one can straightaway begin to use it. It is by default installed during the node.js installation. However, if you want to check the version, you can do it in the terminal.
npm --version
The first thing one has to do to import npm packages is to create a folder and initiate npm in it. To initiate npm, navigate to your project folder in the terminal (in the case of windows, use the command prompt) and run npm init. You will get a list of questionnaires to which you can input your preferences. In the interactive terminal, if nothing is filled it will populate a default value for certain fields like package name, version, and leaves it blank for description, author, etc. Press enter to move on to the next item. In the end, a JSON is created with a list of key-value items that you gave as input.
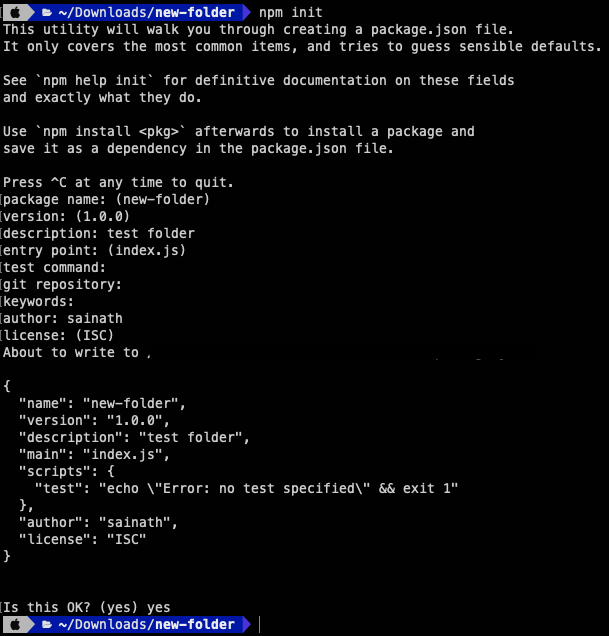
A short way to quickly do the initiation is by running npm init --yes. The yes flag will populate default values and skips the interactive questions to the user.

Installing a package
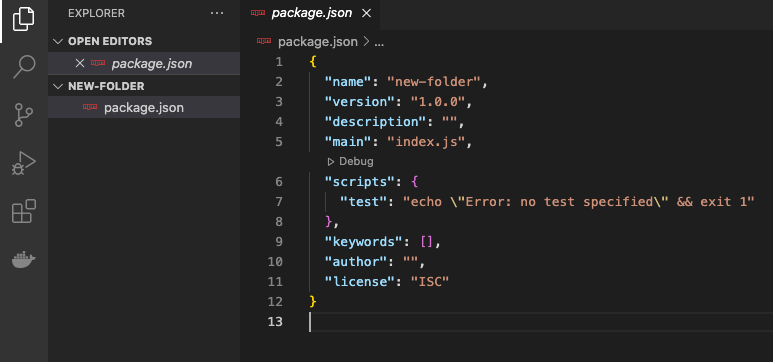
The package.json created by npm can be found inside the project folder. This file is a snapshot of the list of dependencies for the project. It is necessary and be cautious to not delete this file.
The packages can be installed using npm commands.
npm install <package-name> --save
This command will add the package to your local project and the scope remains local i.e. you can't access the package outside of this folder.
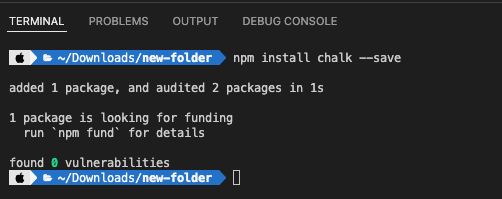
Let's go ahead and install a package for our project. I am going to install chalk which helps in rendering colorful output in the console and this will be useful when you design CLI-based applications.
npm install chalk --save
If everything goes well, the package gets added to the project. If you are getting errors while downloading, check your installation and head to the official project page to see if there are any issues reported.
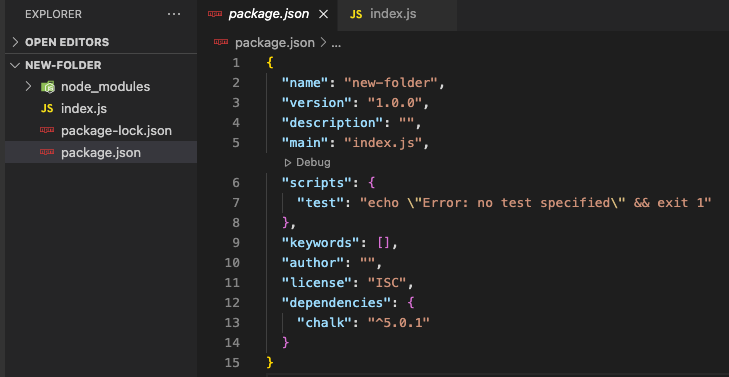
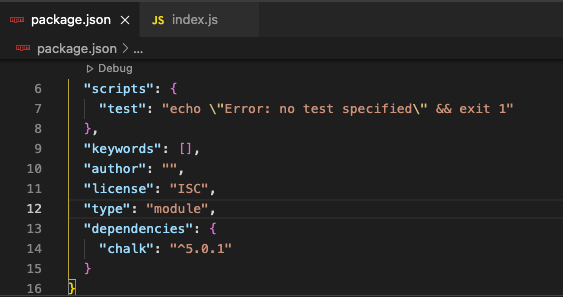
You can find the package name and version in the package.json under dependencies.
node_modules
You can see an additional folder named node_modules got added to our project. It consists of files related to the dependencies that were installed. The size of node_modules is huge and it is downloaded to your machine. You can often find the node_modules folder ignored while pushing your code to the repository. It can also be deleted and a fresh installation of packages can be triggered. Once you have package.json in place, it is no longer necessary to mention the package name to reinstall. All the details of the package and its version are available in the package.json and the installation will pick it up from there.
npm install
Dependencies
There is an option to segregate dependencies based on usage. Not all packages are necessary to be installed, some are meant for development purposes like the nodemon package. Nodemon keeps a watch on your file changes and automatically restarts the node application. This need not be added to your production environment as a dependency as you won't be making any file changes in production. To save a dependency for development purposes, add a flag --save-dev instead of --save. In contrast to local, there is an option to download a package globally to be used by any project by appending the flag -g or --global to the installation package. It is available globally but limited to your machine where it is installed. It is not necessary to install a global package in a project as is it a one-time installation and it will be available to use when imported.
npm install nodemon --save-dev
npm install nodemon -g
Using the installed package
To use a package it should be imported. Different module formats have their unique way of importing. The most known formats are CommonJS(CJS) and ES2015 Modules(ESM). There are also other formats like Asynchronous Module Definition (AMD) and Universal Module Definition (UMD) which you can explore in detail. Packages that use the ESM format insist to import the format using import and the CJS format needs to use require.
#ESM
import chalk from 'chalk'
To use chalk as CJS format, the documentation specifies to downgrade the version as the latest version supports EJS format.
Chalk 5 is ESM. If you want to use Chalk with TypeScript or a build tool, you will probably want to use Chalk 4 for now.
#CJS
const chalk = require('chalk')
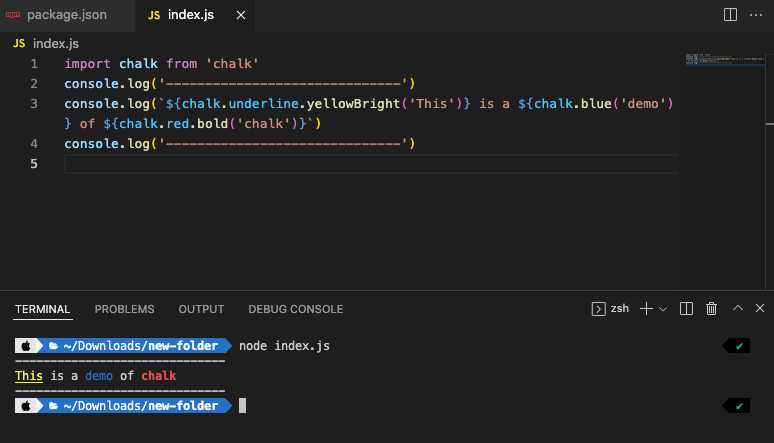
In our example, I have used the ESM format to import the chalk module. An additional entry of type: "module" has to be provided in package.json for using ESM format.
Create an index.js file and import the 'chalk' module. Chalk can now be used to log your output colorfully. Check more about chalk and try it yourself.
Hope this post helped you in understanding the usage of npm. This post only caters to the essentials, you can go deep and learn about the detailed usage of npm on their official page.


